Sending a part's state back to the PLC

A PLC that sends a cylinder somewhere does not assume it got there. Switches on the cylinder tell it which end the rod is at. If a stroke takes too long, because of low air, a jam or a sticking valve, the program raises a fault.

In this guide your blade stop reports blade up and blade down to the program, and the program catches a blade that is too slow. It takes about five minutes.

You need

1. Wire the end positions

Setting the joint's PLC control to Two positions gave the blade stop three tags. Command already holds RaiseBlade. Select Blade Stop 900, open its Comms group, and type the other two:

PartFieldType inMeaning
Blade Stop 900At ABladeDownTrue while the blade is all the way down.
Blade Stop 900At BBladeUpTrue while the blade is all the way up.

The Inspector marks these two write and Command read, from the part's side: the part reads the command and writes where the blade is. While the blade is moving, both are false.

For now the two new fields have a ! beside them. Its tooltip says the program does not declare BladeDown or BladeUp yet. Step 2 declares them.

2. Write the program

Open the PLC tab and replace the program with this one:

PROGRAM Main
VAR
  RaiseBlade : BOOL;
  BladeUp : BOOL;
  BladeDown : BOOL;
  BladeFault : BOOL;
  Cycle : TON;
  Travel : TON;
END_VAR

Cycle(IN := NOT Cycle.Q, PT := T#2s);
IF Cycle.Q THEN
  RaiseBlade := NOT RaiseBlade;
END_IF;

Travel(IN := (RaiseBlade AND NOT BladeUp) OR (NOT RaiseBlade AND NOT BladeDown), PT := T#500ms);
IF Travel.Q THEN
  BladeFault := TRUE;
END_IF;
END_PROGRAM

The first part is the last guide's program: the blade goes up and down every 2 seconds. The second part times each stroke. Travel runs while the blade has been sent somewhere and has not arrived. If that takes more than half a second, BladeFault turns on and stays on until the next Play.

Select Blade Stop 900 again. Each of its three fields now has a ✓, because the program drives RaiseBlade and reads the other two.

The blade stop's Comms group: Command set to RaiseBlade, At A to BladeDown and At B to BladeUp, each with a check mark.
The blade stop's three tags, wired to the program.

3. Run it

Press Play and watch the values in the code editor. BladeUp is true while the blade is up and BladeDown while it is down. Each stroke takes 0.2 seconds, well inside the half second, so BladeFault stays false.

4. Make it fail

Press Stop. A blade with too little air moves slowly, so slow this one down. Select Blade Stop 900 and type:

PartFieldType inMeaning
Blade Stop 900Stroke Time1One second per stroke, twice the time the program allows.

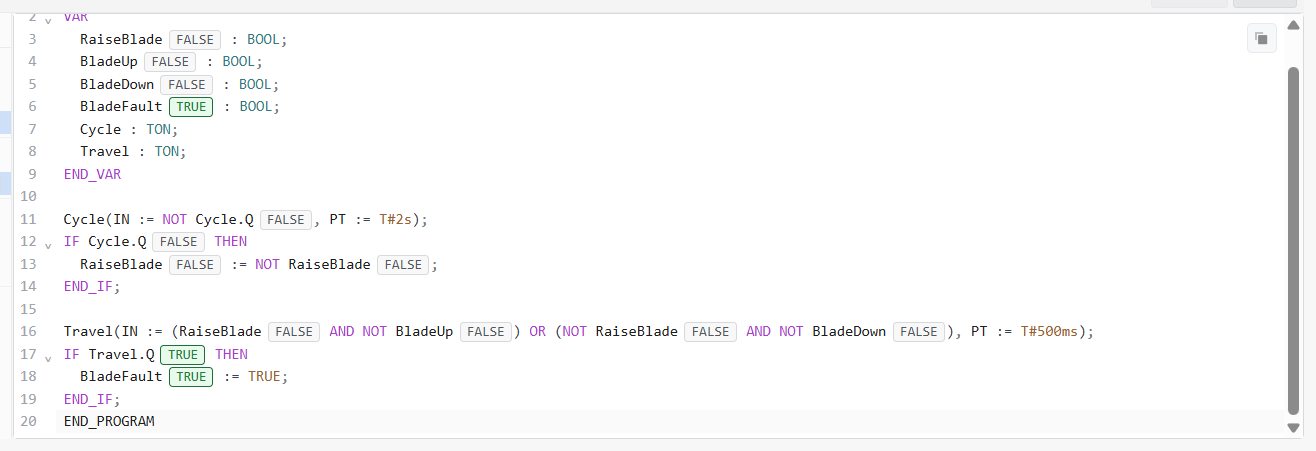
Press Play. The first time the blade rises, it is still on its way after half a second, and BladeFault turns true. It stays true while the blade carries on.

The PLC tab's code editor during a run, with BladeFault shown as TRUE.
A stroke that took too long, caught by the program.

Press Stop and set Stroke Time back to 0.2. The next guide starts from there.

A real program would also stop the line on BladeFault, and wait for an operator to reset it. Here Stop and Play reset it, because each run starts the program from scratch.

Next: Stopping product with a moving part, where the blade holds real boxes.

Troubleshooting

BladeUp and BladeDown stay false.
The copy's At A and At B are empty, or spelled differently from the program. The names must match exactly.
BladeFault turns true at a stroke time of 0.2.
At A and At B are swapped. At A is the bottom, BladeDown, and At B the top, BladeUp. Otherwise check that the program's PT := T#500ms was not changed.
BladeFault stays false at a stroke time of 1.
The Stroke Time was changed on another copy. Select the copy under the conveyor and type it there.